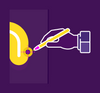
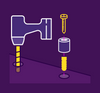
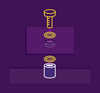
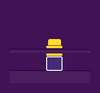
ABOUT OUR LED
NEON SIGNS

Discover everything about our signs and how to install yours. Please read on to see what's included with your sign, a step-by-step installation guide, and instructions on how to use the dimmer remote.
files/Coffee_Gems_Large_3cf78f60-5651-4404-b4ee-f738b78a8a69.jpg

WHAT'S INCLUDED WITH YOUR
CUSTOM LED NEON SIGH

  • Super Energy-efficient Neon 12V LED strips
  • Sleek 6mm premium clear acrylic backboard
  • Mains 12V power supply with 1m black power cable
  • 2m clear power cable from the sign to the adapter
  • Pre-drilled holes + wall mounting kit (screws, stainless steel fixtures & rawl plugs)
  • Covered by our 3-year warranty

Optional Extras:

  • Dimmer Remote & Receiver
  • Battery Pack
  • Ceiling Hanging Kit
  • Waterproofing
  • Cable length upgrades
  • Coloured stand-off wall fixtures

HOW TO HANG
YOUR SIGN

Neon Daddy
1. Mark out & Drill Holes
Take your sign and place it flat up against the wall (it will be easier to have a friend help you out with this part). Use a pen to mark the wall where the predrilled holes are on your signs acrylic backing.
Neon Daddy
2. Drill 'n' Screw
Drill pilot holes exactly on the points you marked out in Step 1 and insert the rawl plugs. Unscrew the top of the studs from the bottom. Put the screw through the bottom half of the stud and screw into the rawl plug with a screwdriver. Repeat this for all holes.
Neon Daddy
3. Attach the Bolts
Hold you sign up so that the predrilled holes are matched up with the bottom part of the wall studs. Screw the top half of the wall studs through the predrilled holes into the bottom half.
Neon Daddy
4. Repeat and Tighten
Your sign should now be sandwiched between the top and the bottom half of the studs. Repeat this for all of the remaining studs. Try not to over tighten them as this can damage the acrylic backing.
Neon Daddy
5. Plug it in!
You can now plug the dimmer remote receiver into the clear power cable on one end, and the black mains power cable into the other. Once this is done, simply plug in the mains power supply (or battery pack) and you are good to go!

DIMMER REMOTE + RECEIVER INSTRUCTIONS
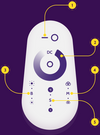
1

On/Off Selection
Turn your sign on and off

2

Brightness Dial / RGB Colour Selection
Single Colour Signs - Select the brightness of your sign
RGB Signs - Select the colour of your sign

3

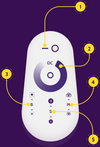
Brightness Selection
Select the brightness of your sign

4

Mode Selection
Single Colour Signs - Change between modes such
as flashing and pulsing.
RGB Colour Signs - Change between modes such
as auto colour rotation.

5

Mode Speed Selection
Changes the speed of the selected mode.

The dimmer remote receiver is to the plugged in between the signs power cable and power supplies cable. Dimmer remotes may vary on extra large signs. Requires 2xAA Batteries (Not Included)
Neon Daddy Neon Daddy